
5 Turf Removal Steps to Prep for Artificial Grass
Thinking about swapping your tired lawn for something a bit more hassle-free? You’re not alone. More and more people are making the switch, but what’s often overlooked is this: a smooth artificial grass starts with solid ground prep. And that doesn’t mean hours of backbreaking labour, by the way. It’s more about knowing what to do, when to do it, and how to avoid the little slip-ups that can mess with the finish.
This guide walks you through five turf removal steps that are, in a way, the unsung heroes of any garden makeover. If you’re planning a bit of DIY grass replacement, these first moves matter. Nail them, and you’ll set the scene for a durable, great-looking result.
Alright, let’s break it down so you can get prepped for artificial grass the right way.
1. Mark Out the Area for Removal

Before any digging starts, you’ll want to define exactly where the artificial grass is going. Sounds obvious, but it’s easy to get this bit wrong — especially if your garden has curves, odd angles or tricky access.
Grab a few basic tools: garden string, wooden stakes, and a can of spray paint. These will help you draw out a clear, visible outline on the ground. For straight lines, a tensioned string between stakes works well. Curves? Spray paint gives you more control. The aim here isn’t perfection — it’s just clarity.
Take a moment to double-check the space. Think about where water drains after a downpour. If you’re blocking natural flow or placing grass where puddles usually form, that could cause issues later.
Measuring right at this stage helps avoid costly over-ordering too. This part is just as much about smart artificial lawn preparation as it is about aesthetics.
2. Cut and Strip Existing Turf

This part’s where the real transformation starts. Taking up the old lawn might look like hard work, but it’s actually quite satisfying once you get going. And you don’t need a shed full of pro gear to do it right.
A sharp spade will do for smaller areas, but for bigger patches, hiring a turf cutter might be worth it — they’re made for slicing under the grass and lifting it in neat strips. Cutting in straight lines first makes it easier to roll up the old turf like a carpet, which is quicker and tidier.
Late spring or early autumn is ideal — the soil’s softer, which makes the job far less stubborn.
A few quick tips before you start:
-
Don’t cut too deep — you’re aiming to remove the grass and its roots, not dig a trench.
-
Wear gloves — blisters love repetitive spade work.
-
Watch for cables or pipes if you’ve got outdoor electrics or irrigation.
-
Plan your turf disposal — your local tip may have green waste rules.
These turf removal steps might be the most physical, but they lay the groundwork for everything to come.
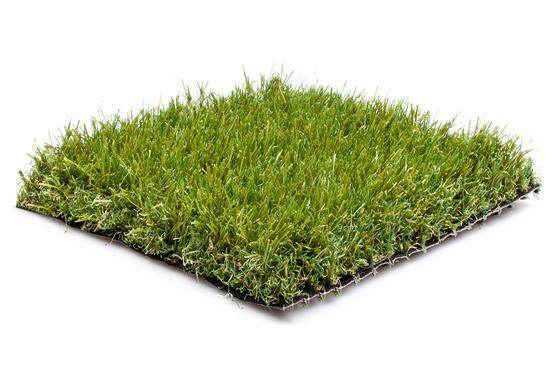
3. Clear Debris and Old Roots
![]()
With the turf gone, you’ll start to see what’s been hiding underneath — and it’s rarely picture-perfect. Bits of roots, stray rocks, and clumps of old thatch often linger, and if they’re left behind, they’ll interfere with how the new surface settles.
A garden fork helps lift embedded roots without disturbing the soil too much. For more stubborn spots, a rotavator breaks things up nicely, especially if the ground feels compacted.
It’s also a smart time to keep an eye out for pests or weeds. A patchy old lawn can be a hiding spot for both. Pull out what you can, and remove anything that looks like it might grow back.
This step is easy to rush — but skipping it often leads to bumps under the grass or uneven drainage. If you’re serious about proper artificial lawn preparation, this bit’s not to be skipped.
Ready to smooth things out? Let’s move on.
4. Level and Compact the Soil

Now’s the time to shape the foundation for your new grass. If this layer isn’t flat and firm, you’ll end up with ripples or sagging spots — not the look anyone’s after.
Start by raking across the whole surface to even things out. Remove any final clumps, stones or soft patches. You’re aiming for a slight slope away from the house to help with drainage, but otherwise, keep it nice and level.
Once the area looks consistent, it’s time to compress the soil. A compactor (also known as a whacker plate) is the best tool for the job — they’re easy to hire for a day. For smaller spots, a heavy garden roller can work too, although it takes a bit more elbow grease.
Here’s a quick guide:
-
Rake the soil to spread it evenly across the cleared area.
-
Use the compactor in straight passes, overlapping slightly each time.
-
Repeat if needed until the soil feels firm underfoot.
-
Avoid working on wet soil, as it can clump and shift after drying.
Taking time with this part is what gives your artificial grass that neat, professional finish. One more step to go.
5. Install a Weed Barrier Layer

Once the ground’s flat and firm, your final prep step is all about long-term peace of mind. A proper weed membrane keeps unwanted growth from pushing through your new lawn — and it also helps water drain away cleanly, which means no pooling or soggy patches.
Lay the membrane over your compacted base, making sure it covers edge to edge. Overlap sheets by at least 10cm if you need more than one. Then secure it using landscaping pins or galvanised nails, spaced evenly to keep everything in place.
Trim off any excess membrane using scissors or a utility knife, and smooth out any creases before the grass goes down.
For this job, Tuda Grass’ weed membrane is a solid pick. It’s heavy-duty, designed for artificial lawn preparation, and handles drainage like a pro — no fuss, no regrowth.
Of all the turf removal steps, this one’s probably the easiest, but it still plays a big part in how long your DIY grass replacement holds up.
