
How to Fix Artificial Grass Seams Seamlessly
Artificial grass has become a favourite option for many homeowners and gardeners who want a lawn that looks tidy all year round without the heavy upkeep. Yet, even the best installations can sometimes show signs of wear, and one of the most common frustrations is a visible seam. These joins, where two rolls of grass meet, can break up the smooth appearance that makes artificial lawns so appealing.
The positive news is that a visible seam is not the end of the road for your lawn. With a little know-how, the right tools, and a calm approach, fixing the problem is straightforward. Repairing seams properly means your grass will look natural again and stay secure for longer. In this guide, we will look at why seams matter, what usually causes them to show, and how you can repair them step by step.
Why Seams in Artificial Grass Matter

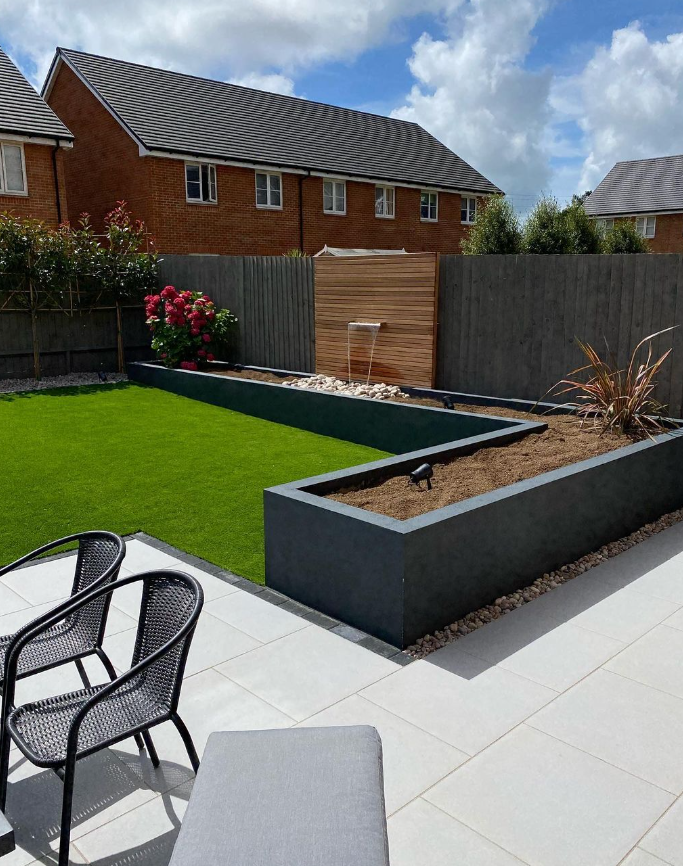
When artificial grass is laid well, the joins between rolls are practically invisible. This smooth finish is what makes a lawn look convincing, as though it were growing naturally. Once seams start to show, the overall effect is spoiled, and the lawn can look patchy or poorly installed. For anyone who has invested time and money into upgrading their outdoor space, that can feel disheartening.
There’s more to it than appearance, though. A seam that is not properly bonded may weaken further with regular use. Over time, edges can lift, creating gaps that are not only unsightly but may also reduce the lifespan of your lawn. For families, pets or keen gardeners who use the space regularly, this can mean repairs come up more often than expected.
That is why seamless installation matters. It protects the durability of your lawn, keeps it safe underfoot, and ensures you get lasting value from your investment.
Common Reasons Seams Become Visible
Even though artificial grass is designed to last for years, seams can still become noticeable for a variety of reasons. Some of these issues appear soon after installation, while others develop gradually as the lawn is used and exposed to the elements. The most frequent causes include:
-
Poor installation technique: If edges are not carefully aligned or pressed together firmly at the start, small gaps can appear and gradually widen.
-
Shifting sub-base or ground movement: The layer beneath the grass, known as the sub-base, may move slightly as soil settles or weather changes. This can cause joins to pull apart.
-
Low-quality adhesive or tape: Weak bonding products tend to break down more quickly, leaving seams loose.
-
Weathering and wear: Sun exposure, rain, and frequent foot traffic can all weaken the bond over time, making seams more visible.
By identifying which of these is the likely culprit, you can approach the repair with more confidence. It also helps to avoid repeating the same mistake during future installations or repairs.
Tools and Materials You’ll Need

Before starting any repair, it makes sense to gather everything in one place. Having the right tools to hand keeps the process smooth and prevents unnecessary interruptions. Most of what you need can be found at DIY shops, and some items may already be in your shed. The essentials include:
-
Seam tape
-
Outdoor adhesive or glue suitable for artificial grass
-
Utility knife with sharp blades
-
Joining pins or galvanised nails
-
A roller or a heavy object for applying steady pressure
These simple tools are all you need to carry out a strong repair. By setting them up before you begin, the actual seam work becomes more straightforward, and you avoid mistakes caused by rushing around mid-task.
Step-by-Step Guide to Fixing Artificial Grass Seams
Repairing a visible seam may seem intimidating at first glance, but by breaking it into clear stages, the process becomes very manageable. Follow these steps carefully, and you’ll be able to restore a smooth, natural look to your lawn:
-
Lift and clean the seam area
Gently pull back the grass on either side of the seam. Use a stiff brush or cloth to remove old adhesive, soil, or debris. A clean surface makes for a stronger bond. -
Apply adhesive and tape correctly
Lay the seam tape down the middle of the join, sticky side up. Spread outdoor adhesive evenly across the tape using a spatula or trowel. Be generous, but avoid thick clumps, which can prevent the edges from sitting flush. -
Align and press edges together
Carefully bring the two edges of the grass back down onto the adhesive. Pay close attention to the direction of the blades, as misaligned fibres will make the seam obvious. Press the edges together slowly to avoid gaps. -
Use pressure to secure the bond
Place a roller, sandbag, or another heavy object along the seam to apply consistent pressure. This helps the adhesive set evenly and reduces the risk of weak spots. -
Let it cure as per product instructions
Each adhesive will have its own curing time. Avoid walking on, brushing, or adding weight to the repaired area until it has fully set. This could be a few hours or overnight, depending on the product.
By taking your time with each step, you give the repair the best chance of lasting. A careful repair will blend seamlessly into the surrounding lawn, restoring both appearance and durability.
Tips for Preventing Future Seam Issues

Fixing a seam is satisfying, but preventing the problem from coming back is even better. With a few careful choices and habits, you can protect your lawn and reduce the need for repeat repairs.
-
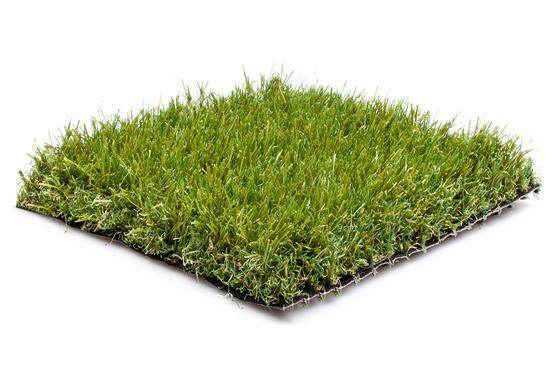
Choose high-quality artificial grass: Premium products are manufactured with stronger backing and fibres, which makes the joins less likely to split.
-
Prepare a solid, stable sub-base: A well-compacted foundation helps the grass stay level, preventing movement that might loosen seams.
-
Use the right adhesive and seam tape: Not all glues are equal. Stick to products recommended for outdoor use and specifically for artificial turf.
-
Take your time with installation: Rushing usually leads to weak bonds. Patience during both the original fitting and any later repairs pays off.
These simple measures give your lawn the best chance of looking seamless for many years, even under regular use.
When to Call a Professional
DIY fixes work well for small seams, but there are times when calling in an expert is the smarter choice. If seams keep reappearing despite your repairs, it could point to a deeper issue with the base or the adhesive used originally. Large areas are also tricky to tackle alone, as aligning long seams perfectly requires both skill and specialist tools.
Confidence plays a role, too. If you feel unsure about handling sharp blades, adhesives, or heavy lifting, there is no harm in stepping back and letting an installer take over. Professional help not only saves time but also ensures the repair is carried out to the highest standard, giving you peace of mind.
Tuda Grass is always here to help, whether you want advice or a full installation service. If you feel your lawn needs more than a DIY fix, get in touch through our contact us page.